Common Troubleshooting Issues with STM32F401RCT6
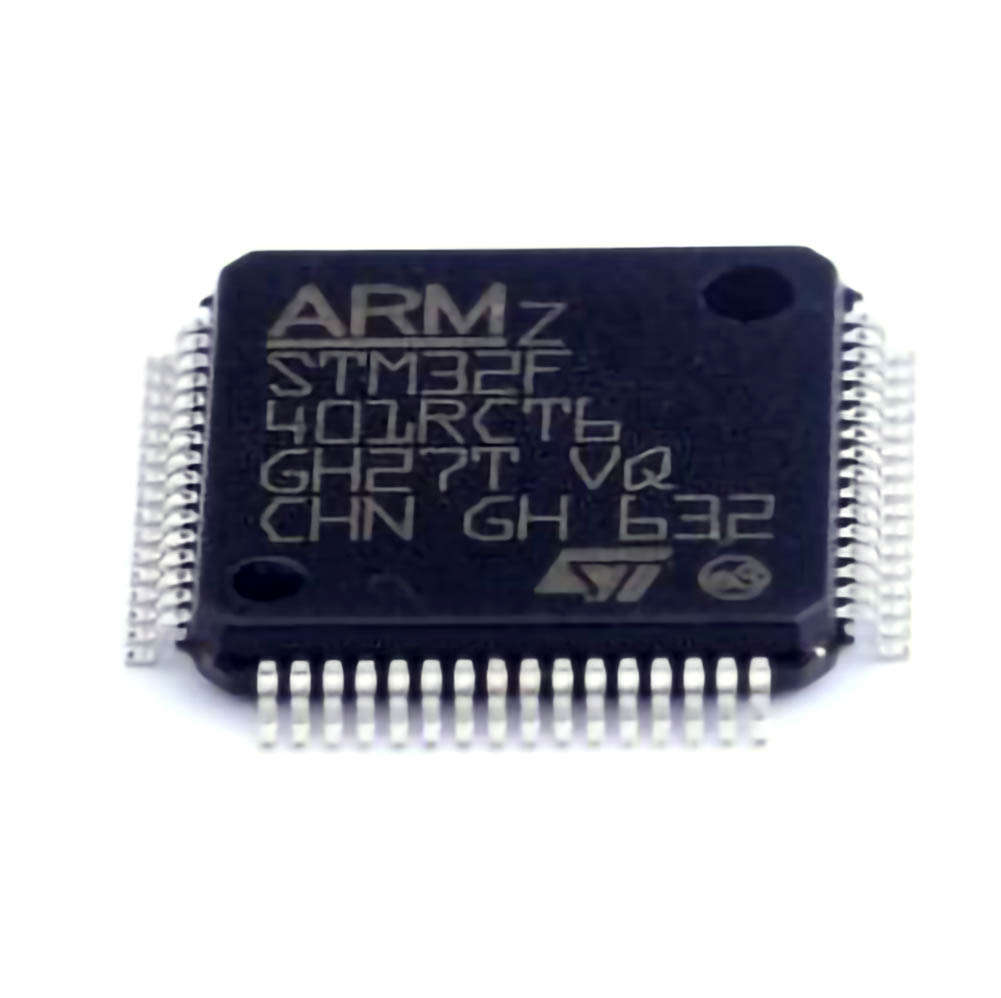
The STM32F401RCT6, part of the STM32F4 series, is a 32-bit ARM Cortex-M4 microcontroller known for its performance and efficiency in various applications like industrial control systems, automotive, and communication protocols. However, as with any complex microcontroller, developers can face certain challenges during development. Understanding these challenges and their potential solutions is crucial for a smooth development process.
1. Power Supply Issues
Problem:
One of the most common issues when working with the STM32F401RCT6 is power supply instability. The microcontroller may fail to initialize, run erratically, or even reset unexpectedly if the power supply is not stable or within the required voltage range.
Solution:
Ensure that the voltage supplied to the STM32F401RCT6 is within the specified range (2.0V to 3.6V for the operating voltage). Use a stable voltage regulator and decoupling capacitor s close to the power pins to ensure smooth operation. It is also advisable to use a multimeter or oscilloscope to check for voltage fluctuations or noise that might cause instability.
2. Incorrect Clock Configuration
Problem:
The STM32F401RCT6 has an internal oscillator (HSI) and supports external oscillators for clocking. Incorrect clock configurations can lead to problems such as the microcontroller failing to boot, running at an incorrect speed, or behaving unexpectedly.
Solution:
Carefully check the clock tree configuration in your code or initialization files. Ensure that the system clock is correctly set and that the relevant clock sources (HSE, HSI, PLL) are properly configured. It is essential to use STM32CubeMX or HAL libraries for clock configuration, as they help ensure the correct setup.
Additionally, always verify if the external oscillator is connected correctly and functioning. If using the internal oscillator (HSI), ensure it's calibrated properly.
3. Boot Mode Problems
Problem:
STM32 microcontrollers have several boot modes (System Memory , Main Flash, or External Memory). If the microcontroller is not entering the desired boot mode, it may not execute the firmware correctly or may appear "dead."
Solution:
The boot mode of the STM32F401RCT6 is controlled by the BOOT0 pin. If this pin is held high, the microcontroller will attempt to boot from system memory (often used for bootloaders). If it's held low, the system boots from the main flash. Check the BOOT0 pin setting during power-up and ensure it's correctly configured for your application.
Use a debugger or a serial bootloader to reflash the firmware in case of boot-related issues.
4. Debugging Difficulties (ST-Link Debugger Issues)
Problem:
A frequent issue developers encounter is debugging difficulties, especially when using the ST-Link debugger. Sometimes the debugger cannot connect to the microcontroller, or the debugging session fails midway.
Solution:
To resolve debugger connection issues, first ensure that the SWD (Serial Wire Debug) pins are correctly connected and that the microcontroller is not in a low-power state. You can try to reset the STM32F401RCT6 by pulling the NRST pin low or using a "connect under reset" option in the debugging tool.
Additionally, ensure that the correct interface (SWD or JTAG) is selected in your IDE. Using STM32CubeProgrammer can help to reestablish the connection and resolve the issue.
5. Peripheral Initialization Failures
Problem:
Peripheral initialization is a critical part of STM32 development. Common peripherals, such as UART, SPI, and I2C, may fail to initialize properly, resulting in communication problems or malfunctioning hardware.
Solution:
For proper peripheral initialization, use STM32CubeMX to generate initialization code. This tool can help you configure the peripherals with minimal errors. Double-check the peripheral configurations, including clock settings, interrupt priorities, and pin assignments.
Ensure that any external devices connected to the peripherals (e.g., sensors or communication module s) are powered properly and that their voltage levels match the expected levels for the STM32F401RCT6.
6. Overheating or Excessive Power Consumption
Problem:
Excessive power consumption or overheating of the STM32F401RCT6 may be caused by incorrect configuration of low-power modes, high-frequency clock settings, or external factors like incorrect voltage.
Solution:
Use STM32's power management features to put the device into low-power states when possible. The STM32F401RCT6 supports several power modes like Sleep Mode, Stop Mode, and Standby Mode. Ensure that the power consumption settings are optimized for your application and that the microcontroller is not running unnecessary peripherals or services.
Additionally, check the thermal environment and ensure proper heat dissipation, especially if the microcontroller is running at high clock frequencies or handling significant loads.
Further Troubleshooting Solutions and Best Practices for STM32F401RCT6
While the first part of this article covered common STM32F401RCT6 troubleshooting issues, the second part delves into more advanced problems and solutions, alongside best practices for developers.
7. Firmware Corruption
Problem:
Firmware corruption is a rare but serious issue where the microcontroller’s flash memory becomes corrupted, often due to power loss during writing or a faulty bootloader.
Solution:
To prevent firmware corruption, always ensure that the firmware is written correctly and that the power supply is stable during the flash writing process. If corruption occurs, use a recovery mode (like a serial bootloader or external programmer) to reload the firmware.
In some cases, enabling the read-out protection (RDP) in the microcontroller’s flash settings can prevent accidental modifications to the flash memory.
8. Interrupt and DMA Issues
Problem:
Interrupts and Direct Memory Access (DMA) are crucial components for efficient STM32F401RCT6 operation, but misconfigurations can lead to missed interrupts, data loss, or system crashes.
Solution:
Ensure that interrupt priorities are set correctly in your firmware. STM32F401RCT6 has a 16-level priority system for interrupts, which should be configured carefully to avoid conflicts. Also, confirm that the vector table and interrupt service routines (ISR) are correctly set up.
For DMA issues, check the DMA stream configuration, ensure that the source and destination addresses are correct, and validate that DMA transfer complete flags are being monitored correctly. Double-check your memory buffers and alignment to ensure that DMA operations are happening as expected.
9. Bootloader Issues
Problem:
In many embedded applications, the STM32F401RCT6 may utilize a bootloader for firmware updates. However, bootloader failures, like the inability to jump to the main application, are a common issue.
Solution:
Verify that the bootloader is correctly placed in the system memory and that the jump from the bootloader to the main application is configured properly. If you're using a custom bootloader, ensure that the jump instruction is correctly placed at the correct memory address.
Debugging tools like OpenOCD or STM32CubeProgrammer can be helpful in checking whether the jump to the main application is successful.
10. Handling External Components
Problem:
External components connected to the STM32F401RCT6, such as sensors, displays, or communication modules, can often cause issues if their interfaces are not correctly initialized or if there is electrical interference.
Solution:
For sensors or other devices, always check that the communication interface (SPI, I2C, UART) is correctly initialized and that the device is powered properly. If you are using analog sensors, ensure that the ADC configuration is accurate, and the input voltage is within the expected range.
Use pull-up or pull-down resistors where necessary to ensure stable logic levels, and consider adding protection diodes for sensitive I/O lines to prevent damage due to voltage spikes.
11. Software Library and HAL Problems
Problem:
Sometimes developers face issues related to using the STM32 HAL (Hardware Abstraction Layer) or low-level libraries, especially when upgrading firmware or working with new peripheral features.
Solution:
Make sure you're using the correct version of the STM32Cube library and HAL for your STM32F401RCT6. Sometimes, upgrading firmware or libraries can cause compatibility issues. Rebuild your project from scratch if necessary and ensure that all dependencies are correctly updated.
Also, ensure that the drivers for any peripherals are properly integrated and that you are using the latest versions of the STM32CubeMX-generated code.
12. General Debugging Best Practices
Problem:
General debugging challenges can often stem from a lack of systematic troubleshooting.
Solution:
Adopting a systematic approach to debugging is crucial. Start by isolating the issue, whether it's in the power supply, clock configuration, or peripherals. Use logging tools (such as UART prints or debugging over SWD) to get insight into the microcontroller’s internal state.
Use the debugging features of your IDE (e.g., STM32CubeIDE or Keil) to step through the code and monitor variables and registers in real-time. This can help pinpoint exactly where things are going wrong.
Conclusion
Troubleshooting the STM32F401RCT6 requires a combination of methodical diagnostics and a solid understanding of the microcontroller’s architecture. By carefully analyzing power supply, clock settings, boot modes, and peripheral configurations, developers can effectively address the common issues that arise during development. With the strategies and best practices outlined in this article, you can ensure a smoother and more reliable embedded system development process using the STM32F401RCT6 microcontroller.
If you are looking for more information on commonly used Electronic Components Models or about Electronic Components Product Catalog datasheets, compile all purchasing and CAD information into one place.


