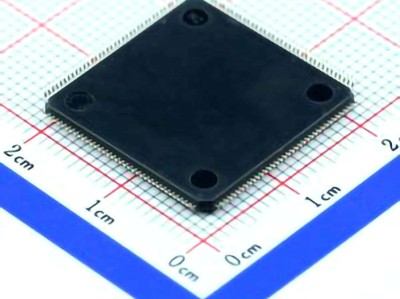
Common Issues in STM32F429ZGT6 Development and How to Resolve Them
Introduction to STM32F429ZGT6
The STM32F429ZGT6 is a Power ful ARM Cortex-M4-based microcontroller from STMicroelectronics, known for its advanced features like a high-performance CPU, a large Flash Memory size, a variety of Communication interface s, and excellent support for embedded systems. It is widely used in applications requiring high computational power, real-time processing, and extensive peripheral support.
However, like any complex hardware platform, developers can run into challenges when integrating this microcontroller into their projects. From initial setup to peripheral configuration, several common issues can arise that may hinder the development process. In this article, we will cover troubleshooting strategies for some of the most common issues associated with the STM32F429ZGT6 and how to resolve them effectively.
1. Power Supply and Reset Issues
One of the most fundamental issues encountered during the development phase is related to power supply and resets. The STM32F429ZGT6 requires a stable voltage (typically 3.3V) to operate correctly. If the microcontroller is not properly powered or experiences fluctuations in power, it may fail to boot or behave unpredictably.
Common Symptoms:
The STM32F429ZGT6 fails to start.
Unreliable behavior during operation.
Random resets or no response to code execution.
Solutions:
Ensure Stable Power Supply: Always verify that your power supply provides a steady 3.3V. Use a multimeter to measure the voltage level and check for any noise or spikes in the supply.
Check for Brown-out Reset (BOR): The STM32F429ZGT6 has built-in Brown-out Reset circuitry to protect against low voltage conditions. Ensure that the BOR threshold is correctly set and that the supply voltage does not dip below the threshold value.
Check the External Reset Pin: If you are using an external reset circuit, ensure that the reset pin is correctly connected and configured.
Use Capacitors for Decoupling: Place decoupling capacitor s near the VDD and VSS pins of the microcontroller to filter out noise and provide stable power.
2. Clock Configuration Problems
The STM32F429ZGT6 microcontroller supports multiple clock sources, including an external crystal oscillator, internal PLL, and various system clock dividers. Incorrect clock configuration can lead to unreliable system performance, or even cause the microcontroller to fail to start.
Common Symptoms:
The microcontroller does not boot or starts intermittently.
Peripherals such as timers and communication module s fail to operate correctly.
The system runs at an incorrect speed.
Solutions:
Double-Check Clock Sources: Verify that the clock source (HSE, PLL, etc.) is correctly configured in your firmware. The STM32CubeMX tool can be very helpful for generating the correct clock configuration code.
Check for External Oscillator Connection: If using an external crystal or oscillator, ensure that it is properly connected to the microcontroller and the correct load capacitors are in place.
Review PLL Settings: Incorrect PLL settings (e.g., multiplier and divider values) can cause the system clock to run too fast or too slow. Make sure these settings match the desired operating conditions.
Enable Clock Monitoring: Use the STM32's clock monitoring features (like HSE and PLL failure detection) to ensure that the microcontroller is running with a valid clock source.
3. Debugging with JTAG/SWD
The STM32F429ZGT6 supports debugging through both JTAG and Serial Wire Debug (SWD) interfaces. If these interfaces are not functioning as expected, it can be difficult to diagnose problems during development.
Common Symptoms:
The debugger cannot connect to the microcontroller.
Breakpoints are not hit, or the program does not pause as expected.
The microcontroller enters a "hard fault" or other exception mode during debugging.
Solutions:
Check Debugger Connection: Ensure that the JTAG or SWD pins are properly connected between the microcontroller and the debugger. In some cases, faulty or loose connections can cause communication failures.
Disable JTAG if Not Needed: The STM32F429ZGT6 allows you to disable the JTAG interface through firmware settings (particularly in the option bytes). If you don't need JTAG debugging, disable it to avoid conflicts with SWD.
Check for Firmware Conflicts: If you are using libraries that configure peripheral functions, ensure that they are not inadvertently reconfiguring the debug interface pins. The STM32CubeMX tool can help you avoid such conflicts.
Use ST-Link or Other Debuggers: ST’s official ST-Link debugger provides excellent support for STM32 microcontrollers. If you are using third-party debugging tools, ensure they are compatible with the STM32F429ZGT6.
4. Peripheral Initialization Problems
STM32F429ZGT6 offers a wide range of peripherals, such as UART, SPI, I2C, ADC, DAC, and GPIOs. Incorrect initialization or configuration of these peripherals can cause issues like communication failures, incorrect voltage levels, or even system crashes.
Common Symptoms:
Peripheral devices (e.g., sensors, displays, etc.) do not communicate.
Communication protocols like UART or SPI are slow or unreliable.
Unexpected results from ADC/DAC conversions.
Solutions:
Check Peripheral Initialization: Use STM32CubeMX to generate the initialization code for your peripherals. This tool can help ensure that all configuration steps are correctly implemented.
Review Clock Settings for Peripherals: Each peripheral requires its own clock source, which must be enabled and configured correctly. Double-check the clock configuration for peripherals to ensure they are operating at the correct frequency.
Configure GPIO Pins Properly: Ensure that all GPIO pins used by peripherals are correctly configured as alternate functions (AF) where necessary. The STM32CubeMX tool can assist in configuring the pins for various peripheral functions.
Debug Peripheral Communication: Use logic analyzers or oscilloscopes to monitor communication signals (e.g., UART TX/RX, SPI MOSI/MISO) and check for anomalies or Timing issues.
5. Memory and Flash Programming Issues
Incorrect handling of memory and Flash programming can result in system crashes, unexpected behavior, or inability to load new firmware onto the device.
Common Symptoms:
The microcontroller does not boot after programming.
Flash memory is not properly written.
The program behaves inconsistently after flashing new firmware.
Solutions:
Ensure Correct Flash Programming: Use STM32CubeProgrammer or other compatible tools to flash the firmware onto the STM32F429ZGT6. Make sure the correct Flash sectors are being written and that no memory areas are corrupted.
Check for Memory Corruption: If the microcontroller behaves unpredictably after flashing, it may be due to memory corruption. Check for issues like incorrect memory alignment or stack overflow.
Use Option Bytes for Flash Protection: The STM32F429ZGT6 has a feature called option bytes, which can be used to protect specific Flash sectors from being accidentally erased or written. If you face issues with Flash programming, check whether the option bytes are set to prevent writes to critical sections of memory.
Advanced Debugging Techniques and Preventive Measures for STM32F429ZGT6
6. FreeRTOS and Real-Time Issues
For developers using FreeRTOS or other real-time operating systems (RTOS) with the STM32F429ZGT6, issues can arise related to task scheduling, interrupt handling, or timing inconsistencies.
Common Symptoms:
Tasks do not execute as expected.
High-priority tasks are delayed or miss deadlines.
Unpredictable system behavior under heavy load.
Solutions:
Check Interrupt Priorities: Ensure that interrupt priorities are correctly configured. STM32F429ZGT6 allows fine-grained control over interrupt priorities, and improper settings can cause real-time scheduling issues.
Use Software Timers: FreeRTOS supports software timers that can help implement periodic tasks. Ensure that timers are configured correctly and do not interfere with other tasks.
Profile Task Execution: Use the built-in trace and profiling features of FreeRTOS or external tools to monitor task execution times and diagnose performance bottlenecks.
7. DMA (Direct Memory Access ) Issues
DMA is a powerful feature of the STM32F429ZGT6, allowing peripherals to transfer data without CPU intervention. However, incorrect configuration of DMA channels can cause data loss or unexpected behavior.
Common Symptoms:
Data transfer fails or is corrupted.
DMA-enabled peripherals do not function as expected.
Interrupts related to DMA are not triggered.
Solutions:
Check DMA Stream Configurations: Make sure that DMA streams and channels are correctly configured for the desired peripheral. Verify that the memory and peripheral addresses are correctly set.
Enable DMA Interrupts: If you rely on DMA interrupts, ensure that the relevant interrupt vector is enabled and that interrupt priorities are configured correctly.
Monitor DMA Status Registers: Use the DMA status registers to monitor the progress of data transfers and check for errors like transfer overrun or under-run.
8. Peripheral Communication Problems (UART, SPI, I2C)
Many embedded systems rely on communication interfaces like UART, SPI, or I2C. Troubleshooting issues with these peripherals can be challenging, especially when dealing with timing, electrical noise, or protocol mismatches.
Common Symptoms:
Data corruption or loss during communication.
Peripheral devices fail to respond.
Communication is intermittent or unreliable.
Solutions:
Use External Debugging Tools: Use an oscilloscope or logic analyzer to inspect the waveforms of UART, SPI, or I2C signals. This can help identify issues like incorrect voltage levels, signal integrity problems, or timing mismatches.
Configure Baud Rates and Timing: Ensure that both the microcontroller and the peripheral devices are configured with matching baud rates and clock settings.
Check Pull-up/Down Resistors : For I2C communication, ensure that proper pull-up resistors are in place on the SDA and SCL lines.
9. Firmware Optimization and Debugging Tips
As systems grow in complexity, performance and debugging can become major concerns. Optimizing firmware and debugging strategies are key to ensuring smooth operation and reducing development time.
Solutions:
Use Compiler Optimization Flags: To improve execution speed and reduce code size, enable optimization flags in the compiler settings.
Isolate and Test Modules : When debugging, isolate problematic code segments and test them independently. This makes it easier to pinpoint the root cause of the issue.
Use Hardware Breakpoints: Set hardware breakpoints to stop the program at critical points and inspect the system state.
Conclusion
The STM32F429ZGT6 is a versatile and powerful microcontroller, but like any complex embedded system, it can present challenges during development. By understanding the common issues related to power supply, clock configuration, debugging, peripheral setup, and memory management, developers can overcome these hurdles and build reliable systems. Use STM32CubeMX, STM32CubeProgrammer, and external debugging tools to streamline development and resolve any issues quickly. With the right approach, you can fully unlock the potential of the STM32F429ZGT6 and deliver robust, high-performance embedded solutions.
Partnering with an electronic components supplier sets your team up for success, ensuring the design, production, and procurement processes are quality and error-free.